The Entity Framework team released the EF Power Tools CTP1 this week. If you use Code First, you really should check this out. First, if you are not familiar with VS extensions (or the term Power Tools), these are basically helpers that you can add into Visual Studio to make your life easier. I wrote a post on my favorite Visual Studio Extension, the Visual Studio Productivity Power Tools that you can check out here.
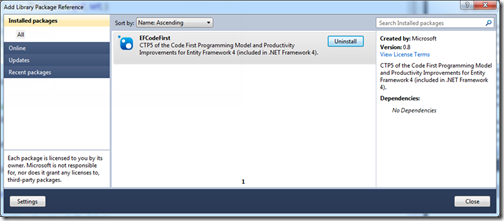
Quick aside … You can install EF 4.1 using NuGet.
- Right click your project and select Add Library Package Reference
- Select Online in the left menu
- Type EntityFramework in the search box
- Click the Install button
The EF team’s post covers the details, but I wanted to cover 2 common scenarios this helps with:
- I’ve Got a Database, It’s Not Complete, But I Want to Create Starter POCO Model Classes
- I have a Database and I want POCO classes with EF Code First, but I am not sure what to map, how to set the DbContext up, etc.
I see this most often when a team is underway in the project. Less often do I see a DB completed 100% then create a model, or a model completed 100% then a DB for that matter. My point is that if you have a database with a decent number of tables in it, you may want a quick and easy way to generate your model classes to get you going. The EF Power Tools can do this for you by pointing them to a database. At that point they will:
- generate the model classes
- map them using the fluent APIs
- create the DbContext
- add the config file settings for the database connection string (which you can then move where you need it)
It is a starting point, meaning that these classes can then be manually changed and tweaked as you need them. Which is exactly what I want in that case. I don’t plan on keeping them tied to the database and auto-gen’d. Instead I just want the grunt work of creating all those classes and mappings done for me and in the end to have a set of POCOs.
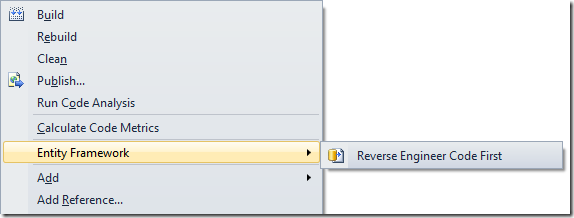
This is also helpful if you have not used EF Code First yet as it will show you how the classes and mappings could look, syntax wise. Here is how you create it:
Check out the team;s post for more details


