Recently I moved my blog to Azure’s cloud. I had some free credits for Windows Azure since I have an MSDN subscription, so I figured why not give it a shot. This move meant 3 big changes for me: Microsoft’s Azure platform, ClearDB’s MySQL services, and making sure I understood the costs in advance. It has been 3 months and overall I’m thrilled with the platform for my blog. This post will show how quickly you can get a WordPress blog up and running.
Azure does a heckuva lot more than host a web site that uses WordPress. But to keep focused, this post will cover my tips for using Azure for WordPress only. My goals for my blog were simple: I want it to be simple and require very little maintenance on my part to keep it functional.
Creating a WordPress Site on Azure
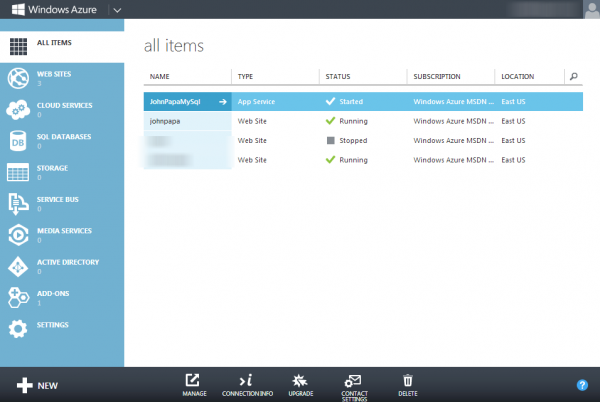
Once you open an account with Windows Azure you can go to their portal to view the buffet of services and products you can purchase. I started by clicking the “New” button in the bottom left hand corner of he screen. This opens a dialog that gives you access to create everything that Azure offers.
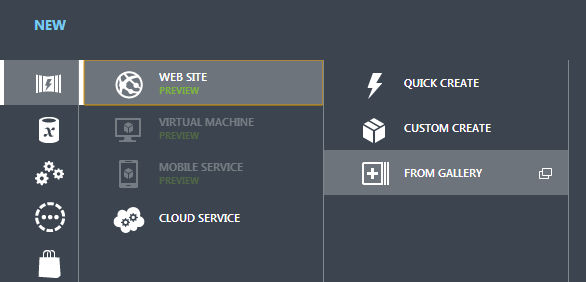
 Perhaps the easiest way to create a WordPress site is to use their gallery. Once you click the “New” button, choose the “Compute” menu option, then choose “Web Site”, and “From Gallery”.
 A new dialog will open with all of the apps that Azure offers. When it opens (it may take a few seconds) scroll down til you see WordPress. Then click the arrows in the wizard and configure your WordPress site.
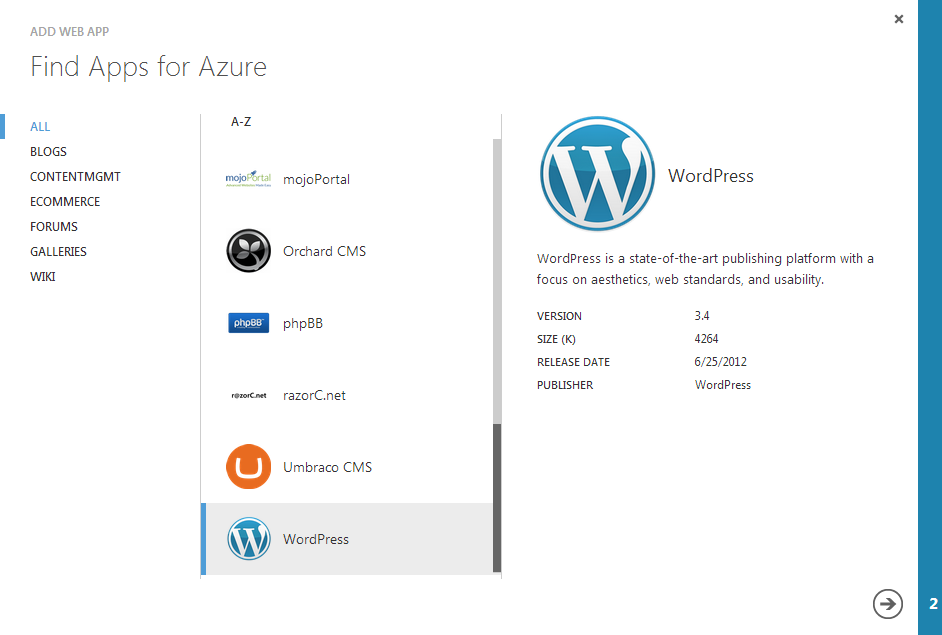 Notice that it currently uses WordPress v3.4 The latest is now 3.5, so you will want to upgrade once you get it installed. I expect Azure will update this soon too.
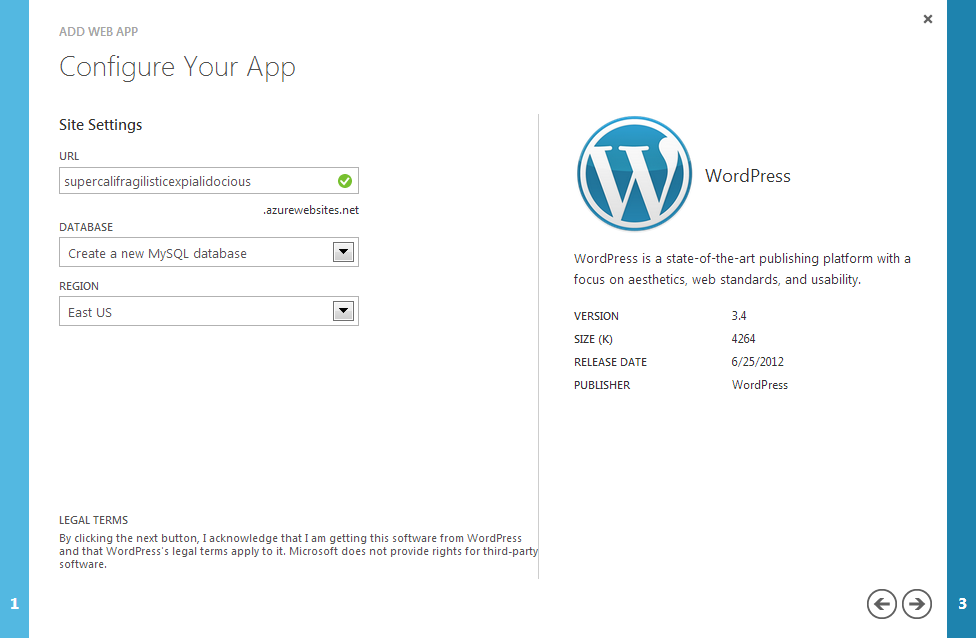 The url is important here if you don’t want your own domain name. It must be unique, so choose wisely.
 If you see an error message about being over your MySQL quota, you need to cancel the wizard and either choose an existing MySQL database or go to the Azure Store and purchase another MySQL database service from ClearDB. Then, once you get a new MySQL instance, you can run the wizard again and it will appear in your pick list.
Purchasing via the Azure store is quite simple. Choose the New button in the bottom menu and choose Store. Then select ClearDB MySQL Database. You can choose a free instance (limited to 20MB and 4 connections), or a paid instance (1GB or more of space).
Essential Plug-Ins
Once you complete the wizard, Azure spins away and launches a blog on your site running WordPress! Then you can add your plug-ins, configure them, and choose a theme. There are tons of plug-ins you can choose from, but I’ll offer a 6 I find very useful:
- Askimet - great for catching spam
- SI Captcha - anti-spam methods to WordPress items
- Configure SMTP
- Contact Form 7 - I have no idea what happened to 1-6, but 7 is a fine contact form
- Pretty GC Syntax Highlighter - adds syntax highlighting in your posts using google prettify
- Jet Pack - like 20 plug-ins in 1, this contains a ton of extras for WordPress including site stats
Azure Site Options
Dashboard and Monitor
The dashboard view gives you a quick glance at your site, its linked resources (like MySQL databases), your FTP host name, connection strings, options to reset credentials, set up git publishing, and more. It also has a link to your publishing profile, which you can use from Visual Studio. The monitor view shows you stats about CPU time, data usage, requests and errors.
Configure
The configure view allows you to add domain names, define connection strings, change your .NET framework or PHP version, and turn on server level settings. I wanted to use my domain name www.johnpapa.net with my blog. This feature was recently added to Azure so it was quite simple to do this. To get there I selected my site johnpapa from the portal.which brought me to my dashboard for the site. Then I clicked the Configure menu option at the top. From here, I clicked the Manage Domains button in the bottom menu and was able to add my domains in there. You simply type in your domain name(s). It also tells you the IP address that you ned to use when configuring your A records with your DNS hosting service. Be sure to do that or the domain won’t be directed here.
Scale
The scale view allows you to change from a free to shared to reserved server if you need more power. This is pretty cool on how quickly it migrates everything for you in seconds, in my case. I was quite impressed by this. You can also choose your instance size (how many cores and memory do you need) as well as your instance count. This page as much as anything will dictate your costs. I chose to use the most powerful I could get and still stay within my free instance (using the MSDN Universal promotion).
Linked Resources
The final view is the linked resources. This is where you can see other services like the MySQL database that your WordPress blog uses. It is totally not obvious here, but that instance is not hosted by Azure but instead by ClearDB. Not that you really care where it is, as long as it is available. Still, it would be nice to know who to ask for support of it.
Summary
Creating the WordPress site was easy. In fact, it was up and running in just a few minutes. As simple as it was, there are a few important notes that I want to reiterate that may or may not be totally obvious.
The MySQL database that you get when you go through the gallery wizard to create the WordPress site has a 20MB limit, though it’s not displayed anywhere during the wizard process nor on the dashboard. When you hit the limit ClearDB will turn off INSERT and UPDATE permissions on your database tables. This will cause terrible errors to show up on your site about permission problems. So the key here is to monitor your database size and keep it in check, or purchase a new larger database for your instance. If you do hit this, please see my follow-up post on tips on how to proactively or reactively fix this.