UPDATE: I’ve created a permanent home for the latest updates for Sticky. Please redirect here to stay updated on the latest versions, enhancements, and how to’s for Sticky.
I’ve created a simple plugin named “Sticky” for Seesmic Desktop that I am sharing. Seesmic’s Desktop Platform enables software developers to enhance the Seesmic Desktop application pretty easily, since is is built upon Silverlight 4 and uses MEF.
![]()
Feel free to use this plugin as you like. It is a simple plug in t hat, shows information about the Twitter user right inline with the Tweet. This post will explain what the Sticky plugin does and of course I’ll share the plugin with you. I’ll follow up with another post to explain how to create a plugin using the Seesmic Desktop platform, Visual Studio 2010, and Expression Blend.
If you want to learn more about the Seesmic Desktop Platform, here are some great links:
- The main Seesmic Desktop Platform web page
- the developer wiki
- Creating your first Desktop Plugin
- Developer discussion groups
Watch “Sticky” In Action
Here is a quick video showing the plugin in action.
Collapsed State
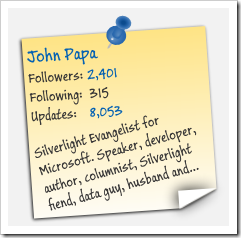
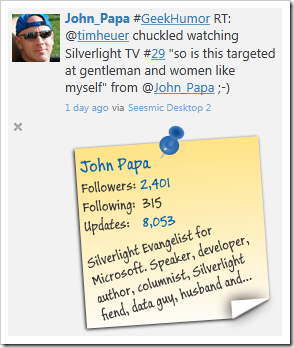
When the Sticky plugin is in its collapsed state you will see a small icon for the plugin and a summary of the Twitter user’s information (see below). It shows the number of Twitter followers, the number of friends and the number of updates for a Twitter user. 
Here is a zoomed in close up of this information and the icon. When creating an icon you can customize the collapsed text as makes sense for your plugin. 
Expanded State
In its expanded state, the Sticky plugin hides the collapsed view and transitions to a larger view. The expanded state shows the user’s friendly name, a link to their web page, a link to the TwitterCounter for the user, a link to their Twitter page, and the user’s Twitter profile bio (see below).

I used some visual states to subtly animate the sticky note when you move your mouse over it. This is a pretty simple use of visual states, easing, and effects which I’ll explore in an upcoming post when I dive into the details of how the plug in is created.
Get It
You can download this plugin from the link below. Feel free to use it as you like. No warranties are provided, use it at your own risk ;-). It comes with the “works on my machine” status.
Install It
For now, the simplest way to install a plugin for Seesmic Desktop 2 is to copy and paste the plugin’s xap file into the appropriate folder:
- Windows: "My Documents\Seesmic\Seesmic Desktop 2\Plugins"
- Windows 7: "Documents\Seesmic\Seesmic Desktop 2\Plugins"
- Mac: "$HOME\Documents\Seesmic\Seesmic Desktop 2\Plugins"
How to
I’ll be posting how to create a plug in, some things to look out for, how to hook into the plugin using MEF, and some additional options that I did not exploit in this plugin. I’ll also show how to create the Sticky note’s look and feel in a post coming to this blog soon.


