Do you want to start Twitching? One of the keys is using software that allows you to send your stream to Twitch. For a lot of folks that means using OBS.
Disclaimer: This worked as of August 2018 and as with all things tech related, things change rapidly. If something doesn't work for you, leave a comment and we'll try to keep it up to date together.
Once you set up OBS you can have fun adding scenes and sources for the stream. This post will focus on the OBS setup, itself - as shown on a Mac.
Brian Clark helped me craft this post. You can check out Brian's Twitch stream here.
I did an experiment in Twitching earlier in 2018 and learned a lot. I'll begin streaming on Twitch again soon, so follow me on Twitch if you might enjoy live coding along with me
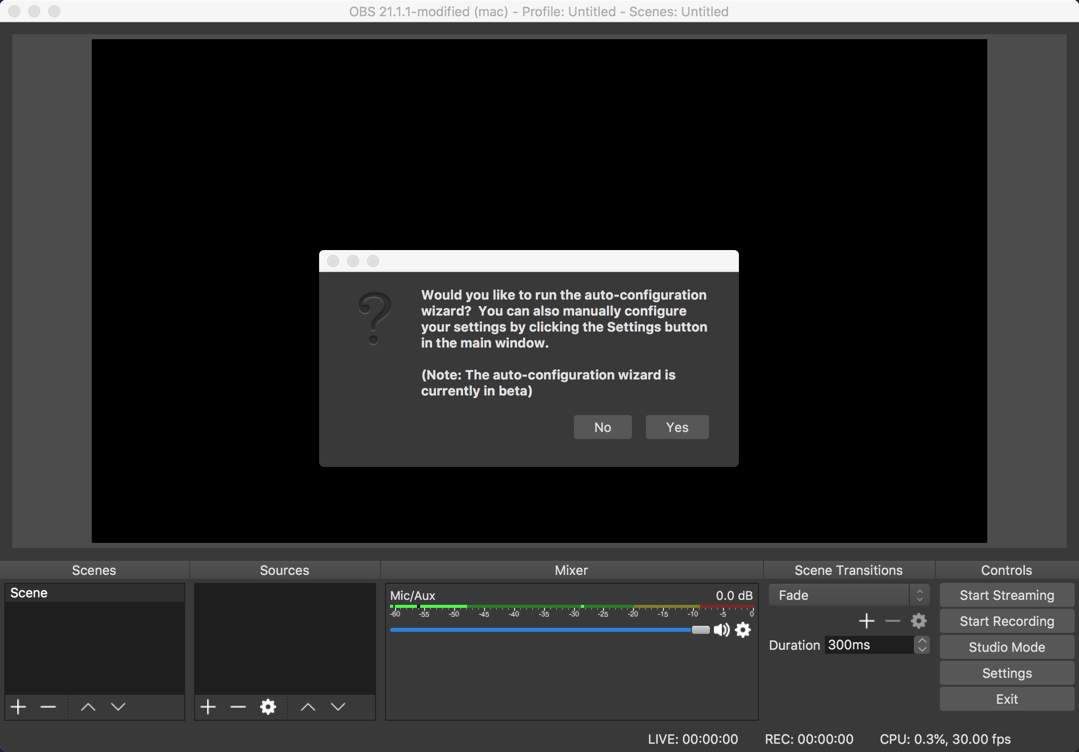
Install Open Broadcaster Software (OBS)
You'll need Open Broadcaster Software (OBS) to stream your Twitch session. Choose your appropriate operating system and install OBS on your computer.
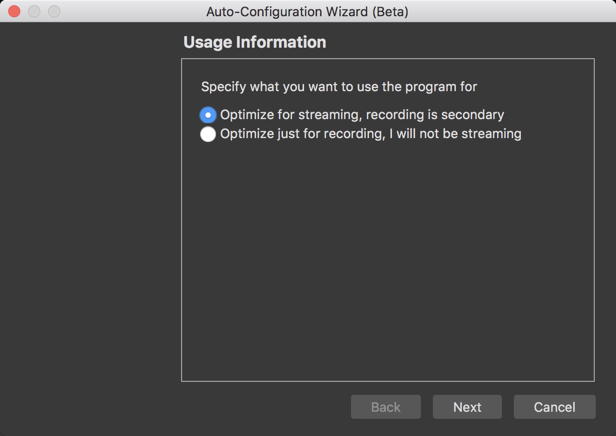
Optimize for streaming, because, well, we are going to be streaming!
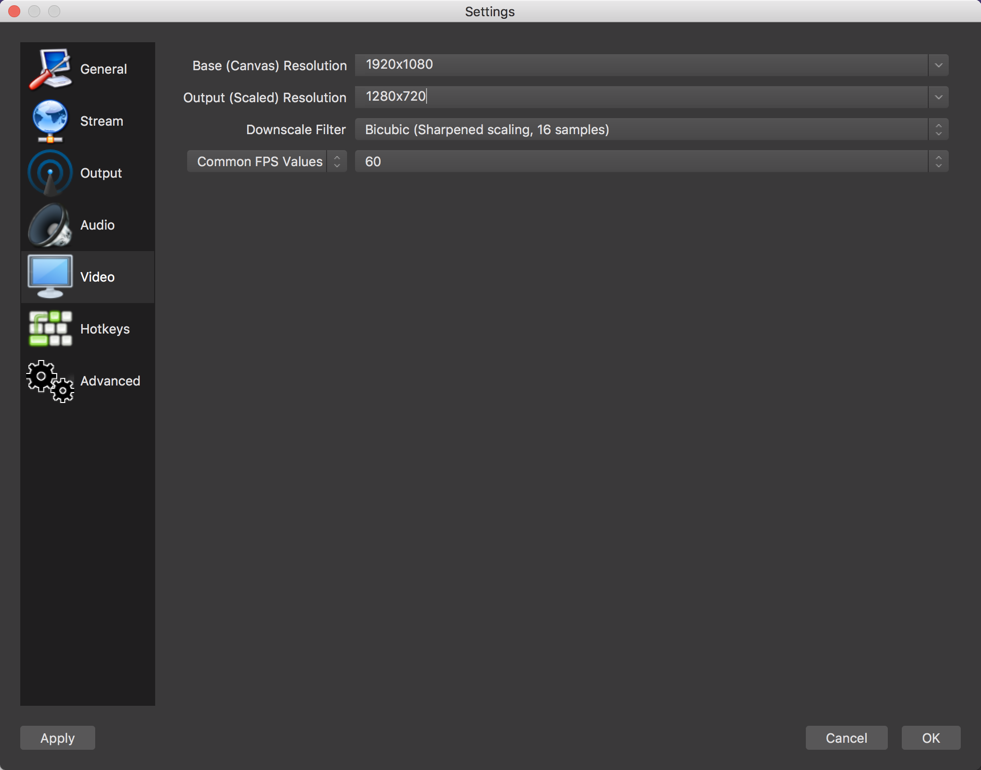
Specify the base canvas, which is the resolution of what you are recording, in your video settings.
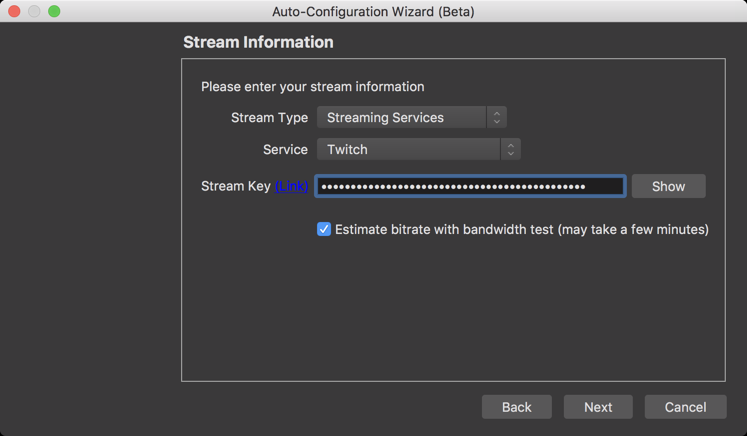
Click the link next to the Stream Key. This will open the Twitch website and bring you to where you can copy your unique stream key. of course, you'll need to log in to Twitch's web site, too.
Copy this key and paste it back into the wizard.
The OBS wizard will test your bandwidth and report back your final results. Once this is complete, click the Apply Settings button.
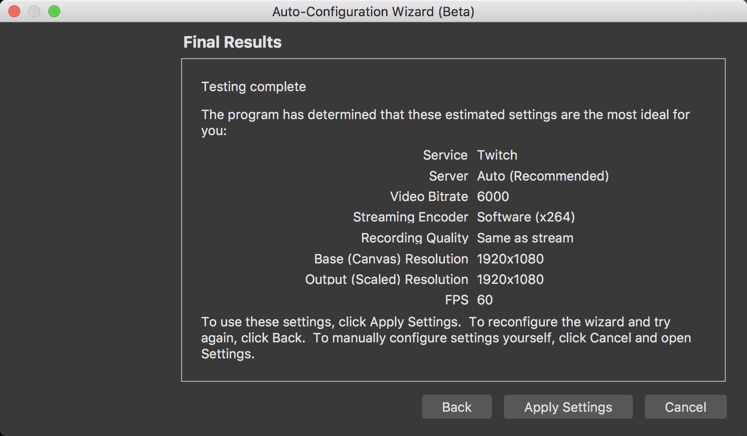
Open your OBS settings, and go to the Output tab. The video bitrate is how much data you send for your stream. Brian and I chose 2500. My OBS was set to 6000, so I changed this to 2500.

We also clicked on the Output mode and selected Advanced. In here you can see the CPU Usage ... the higher you make this, the less CPU that you use. We took this as meaning that the higher you make this, the faster the stream is sent (fewer delays). If you get pixelation (lower quality on your stream), then you may need to spend more time in the CPU.

Open the Video settings and change the output resolution to 1280x720. This is the resolution of what your views see. In our case, it scaled down from 1920x1080 to 1280x720.

Yep ... that's it! Your next steps are to set up your scenes and sources, then begin streaming! Brian is working on sharing a post that shows how to create an overlay that looks all fancy.
Special thanks go out to Suz Hinton. who has an amazing Twitch stream and helped both Brian and I get started!


